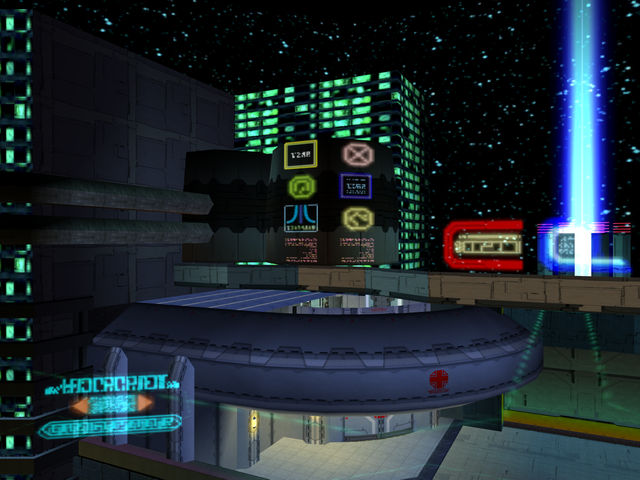
Be aware that these are client-side patches, meaning they require you to patch your ISO of the game. As such, they are only compatible with Wii and Dolphin. Once BlueCrab implements server-side patching, you can use all of these patches on original GC hardware, too. For the moment you would have to have a modchip or homebrew to run a patched version of PSO on a real GC.
Full Word Select Patch
Spoiler!
Code: Select all
Phantasy Star Online GC
Full Word Select Patch
Patcher by: Aleron Ives
Patch by: Ralf
http://psopalace.funurl.com

----------------
Introduction:
----------------

Welcome to the Full Word Select Patch for PSO GC. The purpose of this patch is to fix some of the problems with the game's Word Select menu, namely that a) you can only access the Reply/Confirmation menu when you're in the lobby or on Pioneer 2, so you can't access simple answers like "Yes." and "No." when you're on Ragol, and b) you can only access the Word Select categories for your current location, so you can't access Pioneer 2 Word Selects on Ragol, lobby Word Selects on Pioneer 2, and so forth.

The patch addresses these problems by unlocking a previously unused copy of the Word Select menu used in PSO Ver.2. The V2 Word Select menu allows you to access all Word Select categories at all times, which fixes both of the above problems. If you're unfamiliar with the V2 Word Select menu, there are three things you should know about it:

1) There is no "Recommended answer" category that appears when somebody else asks you a question with Word Select. Instead, relevant replies appear at the top of the "FIXED:ANSWERS" menu, above the "Yes." and "No." options. Once you pick any reply from the answers menu, the relevant replies will disappear, and "Yes." and "No." will be at the top again.

2) The "FIXED:RECOMMEND" category at the top of the menu is a shortcut to the most relevant Word Select category for your current area. This category automatically contains the same strings as the IN THE LOBBY/CITY/AREA/BATTLE categories, depending upon whether you're in the lobby, on Pioneer 2, on Ragol, or in a room with monsters. As such, you can access the most relevant Word Select options for your current situation without having to scroll down to where that category appears in the main Word Select menu.

3) There is no "Other" category. You can find the strings from the "Other" category at the bottom of the "FIXED:GREETINGS" category.

In short, the benefit of the GC Word Select system is that it makes it easier to find specific Word Selects by breaking up the menu into several categories based on where you are, but this also means you may not be able to find the Word Select you want to use if you're in an area where that Word Select doesn't appear in the menu.

The benefit of the V2 Word Select system is that you can use any Word Select at any time, so you always have access to anything you might want to say, but this also means that you have to do a lot of scrolling through massive lists in order to find the Word Select you want to use.

--------------
Installation:
--------------

After downloading and unzipping the PSO_GC_Full_Word_Select_Patch.zip archive, you should have this README.txt file, as well as six different patching programs. Each patching program is meant for one of the six possible PSO GC releases that you might have:

NTSC-J 1.02 (JP regular disc)
NTSC-J 1.05 (JP Plus disc)
NTSC-U 1.00 (US regular disc)
NTSC-U 1.01 (US regular disc)
NTSC-U 1.02 (US Plus disc)
PAL 1.00 (EU regular disc)

If you're not sure which version of the game you have, look at the inner ring on the bottom of your disc, and you should see one of these product numbers:

DOL-GPOJ-0-02 (JP 1.02)
DOL-GPOJ-0-05 (JP 1.05 Plus)
DOL-GPOE-0-00 (US 1.00)
DOL-GPOE-0-01 (US 1.01)
DOL-GPOE-0-02 (US 1.02 Plus)
DOL-GPOP-0-00 (EU 1.00)

You only need to use the patching program that matches the ISO dump of the disc you have.

Always be sure to keep a clean backup copy of your ISO, so that you don't have to dump your game again if you make a mistake!

In order to patch your ISO, you will need to use GCRebuilder to extract the game's main exectuable file, "PsoV3.dol". If you don't have GCRebuilder, you can find it in the GC downloads section of the main site. If you want a tutorial with pictures, you can find one in the GC guides section of the main site; otherwise, follow these steps:

1) Open GCRebuilder, select the "Image" option at the top, then select "Open". GCRebuilder will ask you to select an image to open. Navigate to the location of your PSO ISO file, select it, then click the "Open" button.

2) You will now see information about your PSO disc on the left side of the main GCRebuilder window, as well as a list of all the files on the disc on the right side of the main GCRebuilder window. The files are shown in alphabetical order by default, so use the scrollbar to scroll down until you find the file "PsoV3.dol".

Right click on the filename, and you'll get a small popup with the options "Import..." and "Export...". Click the "Export..." option, and then GCRebuilder will ask where you want to export this file. For simplicity, I suggest exporting it to C:\. Click the "Save" button to export PsoV3.dol to the folder you selected. We're done with GCRebuilder for the moment, but don't close it yet.

3) Now that we have extracted PsoV3.dol from the ISO, it's time to patch it. Run the patching program that matches the PSO disc you have, and then click the "..." button. A window will open asking you to select the "PsoV3.dol" file you want to patch. Navigate to C:\, and you should see the "PsoV3.dol" file you just extracted from your ISO. Select it, then click the "Open" button. I recommend unchecking the "Make a backup when possible" option, as you don't need a backup copy of "PsoV3.dol". Now press the "Start" button, and you should get confirmation that the file was successfully patched. When you close this message, the patching program will automatically close, too. You have now applied the patch, so it's time for the final step.

Before you begin the final step, you may want to apply other patches to your "PsoV3.dol" file. Once you've applied all of the patches you want to use, it's time to put the modified "PsoV3.dol" back into your ISO.

4) You should still have GCRebuilder open at this point, so this step is easy. Right click on "PsoV3.dol" in the GCRebuilder file list again, but this time, select the "Import..." option. A window will open asking you to select the file you want to import. Navigate to C:\ and select the "PsoV3.dol" file you patched in step 3. Click the "Open" button, and then you should get a confirmation window to indicate that the file import was successful.

That's it! You can now close GCRebuilder and use your patched PSO ISO file to play with Wii or Dolphin (or GC, if you have the necessary homebrew).

--------------------
Troubleshooting:
--------------------

If the patching program gives an error that says:

"PsoV3.dol - File size/version missmatch!"

then that means you tried to use a patching program that doesn't match your PSO disc. Double check which version of PSO GC you have and then select the patching program that matches your disc.

---------
Credits:
---------

Huge thanks go out to Ralf for making this patch, as nobody even knew that PSO GC had a fully functional copy of the original Word Select system until he found it, and there are very few people who have the experience needed to find things like this in GC games.

That's the end of this README; I hope everyone enjoys being able to finally use whatever Word Select they want, whenever they want. Don't forget to visit PSO Palace, the home of this patch.

http://psopalace.funurl.com Spoiler!
Code: Select all
Phantasy Star Online GC
Quest Music Patch
Patcher by: Aleron Ives
Patch by: Aleron Ives
http://psopalace.funurl.com

----------------
Introduction:
----------------

Welcome to the Quest Music Patch for PSO GC. The purpose of this patch is to let you hear the correct music when you play Episode I Spaceship and Palace quests, such as Prospective Horizons. With this patch, you will be able to hear "Versus 1: Tricktrack" in Spaceship and "Versus 2: A Longing To Ancient Times" in Palace.

--------------
Installation:
--------------

After downloading and unzipping the PSO_GC_Quest_Music_Patch.zip archive, you should have this README.txt file, as well as six different patching programs. Each patching program is meant for one of the six possible PSO GC releases that you might have:

NTSC-J 1.02 (JP regular disc)
NTSC-J 1.05 (JP Plus disc)
NTSC-U 1.00 (US regular disc)
NTSC-U 1.01 (US regular disc)
NTSC-U 1.02 (US Plus disc)
PAL 1.00 (EU regular disc)

If you're not sure which version of the game you have, look at the inner ring on the bottom of your disc, and you should see one of these product numbers:

DOL-GPOJ-0-02 (JP 1.02)
DOL-GPOJ-0-05 (JP 1.05 Plus)
DOL-GPOE-0-00 (US 1.00)
DOL-GPOE-0-01 (US 1.01)
DOL-GPOE-0-02 (US 1.02 Plus)
DOL-GPOP-0-00 (EU 1.00)

You only need to use the patching program that matches the ISO dump of the disc you have.

Always be sure to keep a clean backup copy of your ISO, so that you don't have to dump your game again if you make a mistake!

In order to patch your ISO, you will need to use GCRebuilder to extract the game's main exectuable file, "PsoV3.dol". If you don't have GCRebuilder, you can find it in the GC downloads section of the main site. If you want a tutorial with pictures, you can find one in the GC guides section of the main site; otherwise, follow these steps:

1) Open GCRebuilder, select the "Image" option at the top, then select "Open". GCRebuilder will ask you to select an image to open. Navigate to the location of your PSO ISO file, select it, then click the "Open" button.

2) You will now see information about your PSO disc on the left side of the main GCRebuilder window, as well as a list of all the files on the disc on the right side of the main GCRebuilder window. The files are shown in alphabetical order by default, so use the scrollbar to scroll down until you find the file "PsoV3.dol".

Right click on the filename, and you'll get a small popup with the options "Import..." and "Export...". Click the "Export..." option, and then GCRebuilder will ask where you want to export this file. For simplicity, I suggest exporting it to C:\. Click the "Save" button to export PsoV3.dol to the folder you selected. We're done with GCRebuilder for the moment, but don't close it yet.

3) Now that we have extracted PsoV3.dol from the ISO, it's time to patch it. Run the patching program that matches the PSO disc you have, and then click the "..." button. A window will open asking you to select the "PsoV3.dol" file you want to patch. Navigate to C:\, and you should see the "PsoV3.dol" file you just extracted from your ISO. Select it, then click the "Open" button. I recommend unchecking the "Make a backup when possible" option, as you don't need a backup copy of "PsoV3.dol". Now press the "Start" button, and you should get confirmation that the file was successfully patched. When you close this message, the patching program will automatically close, too. You have now applied the patch, so it's time for the final step.

Before you begin the final step, you may want to apply other patches to your "PsoV3.dol" file. Once you've applied all of the patches you want to use, it's time to put the modified "PsoV3.dol" back into your ISO.

4) You should still have GCRebuilder open at this point, so this step is easy. Right click on "PsoV3.dol" in the GCRebuilder file list again, but this time, select the "Import..." option. A window will open asking you to select the file you want to import. Navigate to C:\ and select the "PsoV3.dol" file you patched in step 3. Click the "Open" button, and then you should get a confirmation window to indicate that the file import was successful.

That's it! You can now close GCRebuilder and use your patched PSO ISO file to play with Wii or Dolphin (or GC, if you have the necessary homebrew).

--------------------
Troubleshooting:
--------------------

If the patching program gives an error that says:

"PsoV3.dol - File size/version missmatch!"

then that means you tried to use a patching program that doesn't match your PSO disc. Double check which version of PSO GC you have and then select the patching program that matches your disc.

---------
Credits:
---------

Thanks go out Ivy/Kuromori Yu for teaching me how to make memory dumps with Dolphin's debugger, as this patch wouldn't have been possible otherwise.

That's the end of this README; I hope everyone enjoys having the correct music in Spaceship and Palace. Don't forget to visit PSO Palace, the home of this patch.

http://psopalace.funurl.com Spoiler!
Code: Select all
Phantasy Star Online GC
Disc Music Patch
Patcher by: Aleron Ives
Patch by: Aleron Ives
http://psopalace.funurl.com

----------------
Introduction:
----------------

Welcome to the Disc Music Patch for PSO GC. The purpose of this patch is to change the obnoxious music that most of the music discs play into something people might actually want to listen to. Hopefully you approve of my music selections. =P

The patch makes the following music changes:

Disc Vol.1: Wedding -> Rose Confession
Disc Vol.4: Open Your Heart -> Versus 1: Tricktrack
Disc Vol.5: Live & Learn -> Versus 2: A Longing To Ancient Times
Disc Vol.6: Dreams (Kids) -> Leavin' Flow

Remember that this patch only affects what you hear when each disc is playing; it doesn't affect what anybody else hears, so you should still be courteous and ask your teammates' permission before you force them to listen to songs they might not enjoy. ;)

--------------
Installation:
--------------

After downloading and unzipping the PSO_GC_Disc_Music_Patch.zip archive, you should have this README.txt file, as well as six different patching programs. Each patching program is meant for one of the six possible PSO GC releases that you might have:

NTSC-J 1.02 (JP regular disc)
NTSC-J 1.05 (JP Plus disc)
NTSC-U 1.00 (US regular disc)
NTSC-U 1.01 (US regular disc)
NTSC-U 1.02 (US Plus disc)
PAL 1.00 (EU regular disc)

If you're not sure which version of the game you have, look at the inner ring on the bottom of your disc, and you should see one of these product numbers:

DOL-GPOJ-0-02 (JP 1.02)
DOL-GPOJ-0-05 (JP 1.05 Plus)
DOL-GPOE-0-00 (US 1.00)
DOL-GPOE-0-01 (US 1.01)
DOL-GPOE-0-02 (US 1.02 Plus)
DOL-GPOP-0-00 (EU 1.00)

You only need to use the patching program that matches the ISO dump of the disc you have.

Always be sure to keep a clean backup copy of your ISO, so that you don't have to dump your game again if you make a mistake!

In order to patch your ISO, you will need to use GCRebuilder to extract the game's main exectuable file, "PsoV3.dol". If you don't have GCRebuilder, you can find it in the GC downloads section of the main site. If you want a tutorial with pictures, you can find one in the GC guides section of the main site; otherwise, follow these steps:

1) Open GCRebuilder, select the "Image" option at the top, then select "Open". GCRebuilder will ask you to select an image to open. Navigate to the location of your PSO ISO file, select it, then click the "Open" button.

2) You will now see information about your PSO disc on the left side of the main GCRebuilder window, as well as a list of all the files on the disc on the right side of the main GCRebuilder window. The files are shown in alphabetical order by default, so use the scrollbar to scroll down until you find the file "PsoV3.dol".

Right click on the filename, and you'll get a small popup with the options "Import..." and "Export...". Click the "Export..." option, and then GCRebuilder will ask where you want to export this file. For simplicity, I suggest exporting it to C:\. Click the "Save" button to export PsoV3.dol to the folder you selected. We're done with GCRebuilder for the moment, but don't close it yet.

3) Now that we have extracted PsoV3.dol from the ISO, it's time to patch it. Run the patching program that matches the PSO disc you have, and then click the "..." button. A window will open asking you to select the "PsoV3.dol" file you want to patch. Navigate to C:\, and you should see the "PsoV3.dol" file you just extracted from your ISO. Select it, then click the "Open" button. I recommend unchecking the "Make a backup when possible" option, as you don't need a backup copy of "PsoV3.dol". Now press the "Start" button, and you should get confirmation that the file was successfully patched. When you close this message, the patching program will automatically close, too. You have now applied the patch, so it's time for the final step.

Before you begin the final step, you may want to apply other patches to your "PsoV3.dol" file. Once you've applied all of the patches you want to use, it's time to put the modified "PsoV3.dol" back into your ISO.

4) You should still have GCRebuilder open at this point, so this step is easy. Right click on "PsoV3.dol" in the GCRebuilder file list again, but this time, select the "Import..." option. A window will open asking you to select the file you want to import. Navigate to C:\ and select the "PsoV3.dol" file you patched in step 3. Click the "Open" button, and then you should get a confirmation window to indicate that the file import was successful.

That's it! You can now close GCRebuilder and use your patched PSO ISO file to play with Wii or Dolphin (or GC, if you have the necessary homebrew).

--------------------
Troubleshooting:
--------------------

If the patching program gives an error that says:

"PsoV3.dol - File size/version missmatch!"

then that means you tried to use a patching program that doesn't match your PSO disc. Double check which version of PSO GC you have and then select the patching program that matches your disc.

---------
Credits:
---------

Thanks go out Ivy/Kuromori Yu for teaching me how to make memory dumps with Dolphin's debugger, as this patch wouldn't have been possible otherwise.

That's the end of this README; I hope everyone enjoys the new music options. Don't forget to visit PSO Palace, the home of this patch.

http://psopalace.funurl.com Spoiler!
Code: Select all
Phantasy Star Online GC
Ending Music Patch
Patcher by: Aleron Ives
Patch by: Aleron Ives
http://psopalace.funurl.com

----------------
Introduction:
----------------

Welcome to the Ending Music Patch for PSO GC. The purpose of this patch is to replace the short, looping ending music that normally plays when you beat Dark Falz and Olga Flow online with the full songs that play during the credits in offline mode. In the case of Dark Falz, this also allows you to hear the lyrics to "Can Still See The Light", as the looping version of the song omits the lyrics entirely.

--------------
Installation:
--------------

After downloading and unzipping the PSO_GC_Ending_Music_Patch.zip archive, you should have this README.txt file, as well as six different patching programs. Each patching program is meant for one of the six possible PSO GC releases that you might have:

NTSC-J 1.02 (JP regular disc)
NTSC-J 1.05 (JP Plus disc)
NTSC-U 1.00 (US regular disc)
NTSC-U 1.01 (US regular disc)
NTSC-U 1.02 (US Plus disc)
PAL 1.00 (EU regular disc)

If you're not sure which version of the game you have, look at the inner ring on the bottom of your disc, and you should see one of these product numbers:

DOL-GPOJ-0-02 (JP 1.02)
DOL-GPOJ-0-05 (JP 1.05 Plus)
DOL-GPOE-0-00 (US 1.00)
DOL-GPOE-0-01 (US 1.01)
DOL-GPOE-0-02 (US 1.02 Plus)
DOL-GPOP-0-00 (EU 1.00)

You only need to use the patching program that matches the ISO dump of the disc you have.

Always be sure to keep a clean backup copy of your ISO, so that you don't have to dump your game again if you make a mistake!

In order to patch your ISO, you will need to use GCRebuilder to extract the game's main exectuable file, "PsoV3.dol". If you don't have GCRebuilder, you can find it in the GC downloads section of the main site. If you want a tutorial with pictures, you can find one in the GC guides section of the main site; otherwise, follow these steps:

1) Open GCRebuilder, select the "Image" option at the top, then select "Open". GCRebuilder will ask you to select an image to open. Navigate to the location of your PSO ISO file, select it, then click the "Open" button.

2) You will now see information about your PSO disc on the left side of the main GCRebuilder window, as well as a list of all the files on the disc on the right side of the main GCRebuilder window. The files are shown in alphabetical order by default, so use the scrollbar to scroll down until you find the file "PsoV3.dol".

Right click on the filename, and you'll get a small popup with the options "Import..." and "Export...". Click the "Export..." option, and then GCRebuilder will ask where you want to export this file. For simplicity, I suggest exporting it to C:\. Click the "Save" button to export PsoV3.dol to the folder you selected. We're done with GCRebuilder for the moment, but don't close it yet.

3) Now that we have extracted PsoV3.dol from the ISO, it's time to patch it. Run the patching program that matches the PSO disc you have, and then click the "..." button. A window will open asking you to select the "PsoV3.dol" file you want to patch. Navigate to C:\, and you should see the "PsoV3.dol" file you just extracted from your ISO. Select it, then click the "Open" button. I recommend unchecking the "Make a backup when possible" option, as you don't need a backup copy of "PsoV3.dol". Now press the "Start" button, and you should get confirmation that the file was successfully patched. When you close this message, the patching program will automatically close, too. You have now applied the patch, so it's time for the final step.

Before you begin the final step, you may want to apply other patches to your "PsoV3.dol" file. Once you've applied all of the patches you want to use, it's time to put the modified "PsoV3.dol" back into your ISO.

4) You should still have GCRebuilder open at this point, so this step is easy. Right click on "PsoV3.dol" in the GCRebuilder file list again, but this time, select the "Import..." option. A window will open asking you to select the file you want to import. Navigate to C:\ and select the "PsoV3.dol" file you patched in step 3. Click the "Open" button, and then you should get a confirmation window to indicate that the file import was successful.

That's it! You can now close GCRebuilder and use your patched PSO ISO file to play with Wii or Dolphin (or GC, if you have the necessary homebrew).

--------------------
Troubleshooting:
--------------------

If the patching program gives an error that says:

"PsoV3.dol - File size/version missmatch!"

then that means you tried to use a patching program that doesn't match your PSO disc. Double check which version of PSO GC you have and then select the patching program that matches your disc.

---------
Credits:
---------

Thanks go out Ivy/Kuromori Yu for teaching me how to make memory dumps with Dolphin's debugger, as this patch wouldn't have been possible otherwise.

That's the end of this README; I hope everyone enjoys having the full ending music in online mode. Don't forget to visit PSO Palace, the home of this patch.

http://psopalace.funurl.com


